How to Write a Check: A Guide for Beginners
Writing a check might feel old-school in our app-happy world. But guess what? This classic payment method isn’t going anywhere. Whether you’re paying rent, sending a gift, or dealing with a business that prefers paper, knowing how to write a check correctly is a money skill worth having.
Don’t worry if you’ve never written one before. We’ll walk you through every step, from understanding what goes where to avoiding costly mistakes. By the end of this guide, you’ll be filling out checks like a pro.
Key Takeaways
- A check is a written order telling your bank to pay someone from your account
- Each part of a check serves a specific purpose – date, payee, amount, signature, and more
- Always use blue or black pen and fill out every required field completely
- The written dollar amount takes priority if it differs from the numerical amount
- Never sign a blank check or use correction fluid – void it and start over instead
- Checks are still useful for rent, gifts, and situations where digital payments aren’t practical
- Keep your checkbook secure and monitor your account to avoid bounced check fees
Why Checks Still Matter Today
A check is basically a paper promise to your bank. It says “pay this amount from my account to this person.” Think of it as a written order that moves money from point A to point B.
Sure, we live in a digital world full of payment apps and online banking. But checks haven’t disappeared for good reasons. Many landlords still want checks for rent payments. Some utility companies prefer them too. Small businesses might not have fancy payment systems set up yet.
Checks also work great when you don’t want to share your bank info online. They create a physical record of your spending, which helps with budgeting and taxes. Plus, they’re perfect for gifts – try wrapping up a Venmo payment!
Understanding the Parts of a Check
Think of a check like a form with specific spots for different information. Each section has a job to do. Let’s break down this financial map piece by piece.
Your personal information usually sits in the top-left corner. This includes your name and address, printed by the bank when you order checks.
The check number is pre-printed in the top right corner. These are sequential numbers and are unique to each check in your check book. This helps with tracking your written checks and balancing your check book.
The date line goes in the top-right corner, usually below the check number. Always use the current date when writing a check. This tells everyone when you authorized the payment.
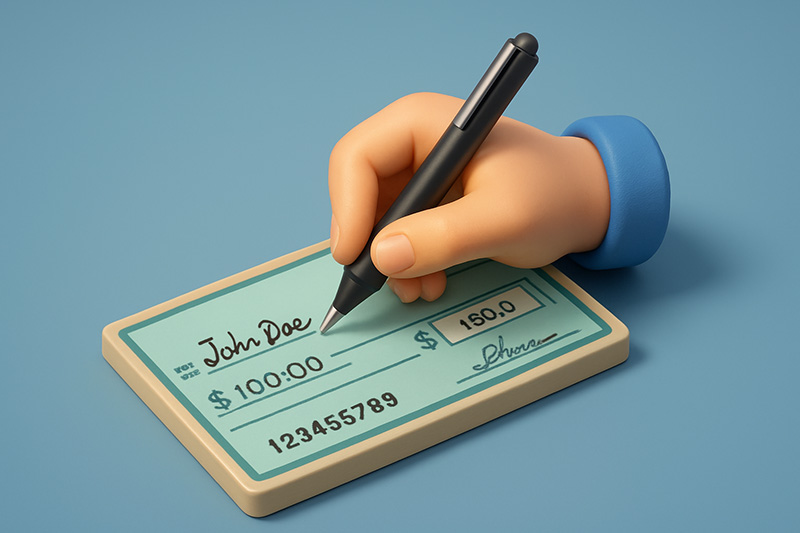
The payee line says “Pay to the Order Of” followed by a blank space. This is where you write the full name of whoever gets the money. Could be a person, business, or organization.
You’ll see two spots for the dollar amount. The small box near the payee line is for numbers like $25.50. The longer line below is where you spell out the same amount in words. In this example, you would write out: Twenty Five and 50/100.
The memo line is optional but handy. Use it for notes like “July rent” or “birthday gift.” This helps you remember what the payment was for.
Your signature goes on the bottom-right line. This makes the check official and valid. No signature means no payment.
At the bottom of every check, you’ll find important numbers. The routing number, which is 9 digits, identifies your bank. Your account number points to your specific checking account, within that bank. The check number will usually appear again at the bottom, either to the left or right of the other numbers.
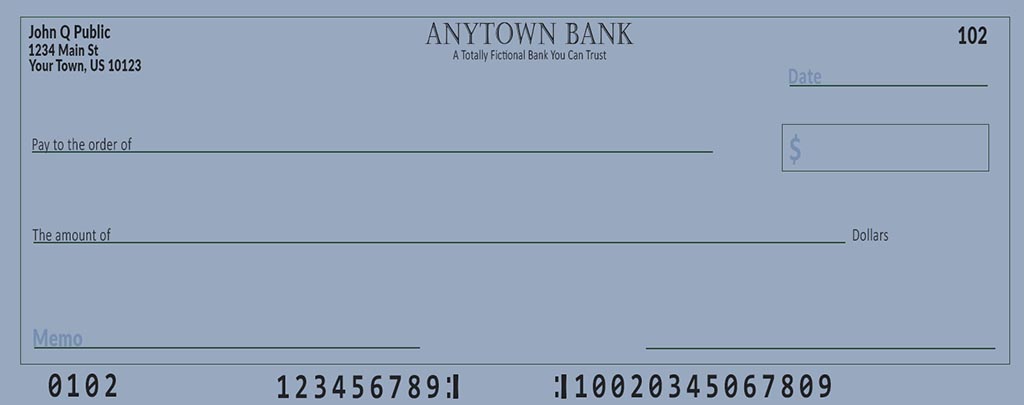
Don’t forget about the back! The endorsement line is where the person receiving your check signs to cash or deposit it.
Step-by-Step Guide: How to Write a Check
Ready to learn the actual process? Grab a blue or black pen – never use pencil or colorful inks. Banks prefer permanent ink that won’t smudge or fade.
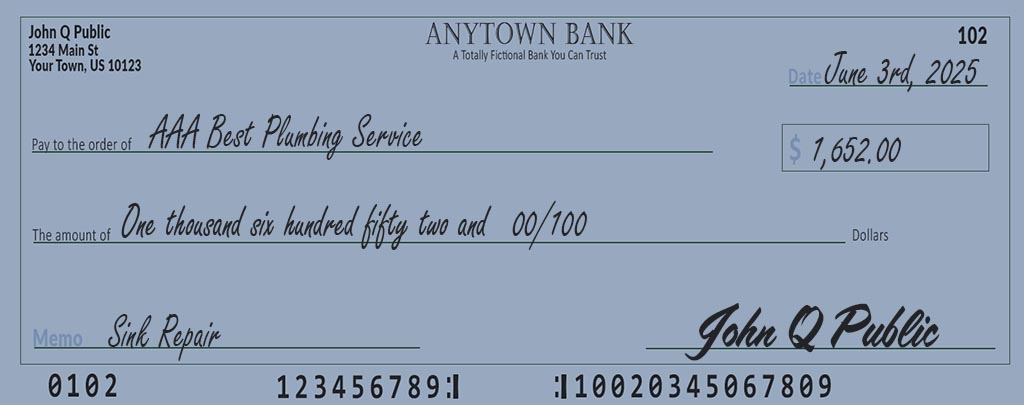
Step 1: Fill in the date. Write today’s date in the top-right corner. You can use the month/day/year format most people recognize, like 12/15/2025. You can also spell it out, like “Dec. 15th, 2025”
Step 2: Name your payee. On the “Pay to the Order Of” line, write the full name of who gets paid. Double-check spelling! A misspelled name can cause delays or rejection. If it’s a business, use their official name exactly as they’ve told you.
Step 3: Enter the numerical amount. In the small dollar sign box, write the payment amount using numbers. Include cents even for whole dollar amounts – write $50.00, not just $50. This prevents confusion and makes it more difficult for someone to add more numbers later.
Step 4: Write out the dollar amount in words. This step trips up many people, but it’s crucial for check security. Write “Fifty and 00/100” for $50.00. For $25.75, write “Twenty-five and 75/100.” Always draw a line after the written amount to prevent anyone from adding extra words.
Here’s a handy tip, instead of writing “One thousand five hundred”, you can save some hand cramping by writing “Fifteen hundred”. This is perfectly acceptable.
Step 5: Add a memo if you want. The memo line isn’t required, but it’s helpful. Write something brief like “electric bill” or “loan payment.” This creates a record for your budgeting purposes.
Step 6: Sign your name. This is the most important step in check writing. Your signature authorizes the payment. Sign exactly as your signature appears on your bank records. An unsigned check is worthless paper.
Never sign blank checks, for any reason
Take your time with each step. Rushing leads to mistakes that can cost time and money.
Common Check Writing Mistakes to Avoid
Even small errors can cause big headaches when writing a check. Let’s cover the mistakes that happen most often so you can dodge them.
Wrong payee information tops the list. Misspelling someone’s name seems minor, but banks take it seriously. They might reject the check entirely. Always double-check names and ask for correct spelling if you’re unsure.
You can use nicknames, but within reason. For example “Bob” for “Robert” or “Steve” for “Stephen” are usually acceptable. But if your friend’s name is Austin and he goes by “Tex”, it’s probably best to make it out to the legal, given name.
Mismatched amounts create another common problem. If your numerical amount says $100.00 but you write “fifty dollars” on the word line, which one wins? Usually the written amount, but some banks will reject the whole check. Make sure both amounts match perfectly.
Missing signatures make checks invalid instantly. Banks won’t process unsigned checks, period. Don’t pre-sign blank checks either – anyone who finds one could fill it out and drain your account.
Date problems cause issues, too. Undated checks might get rejected or automatically filled in with today’s date. Very old dates (over six months) might make checks “stale” and unusable.
Using correction fluid or erasers sends red flags to banks. They’ll often reject checks with white-out or obvious changes because they look like fraud attempts. If you mess up, void the check and start fresh.
Pencil marks won’t cut it for official payments. Pencil can be erased and changed, making checks less secure. Stick with permanent blue or black ink every time.
What to Do If You Make a Mistake
Nobody’s perfect, and mistakes happen when writing checks. How you handle them makes all the difference.
For minor errors like a small spelling mistake or wrong date, you might be able to fix it. Draw one clean line through the mistake – don’t scribble it out. Write the correct information clearly above or next to the crossed-out part. Put your initials next to the correction to show you approved the change.
This only works for small mistakes, though. If you mess up the amount, payee name badly, or signature area, it’s better to start over.
How to void a check properly: Grab your blue or black pen and write “VOID” in large capital letters across the front. You can write it multiple times over important areas like the amount and signature lines. Don’t cover the routing and account numbers at the bottom – you might need those visible for setting up direct deposits.
Record the voided check in your checkbook register so you don’t lose track of check numbers. Keep a copy for your records if needed, then tear up and toss the original. Write a fresh check with all the correct information.
When Are Checks Still Useful Today?
Despite all our digital payment options, checks still win in certain situations. Knowing when to use them saves time and hassle.
Regular monthly payments often work better with checks. Many landlords prefer them for rent because they create clear records. Some utility companies give discounts for check payments since they avoid credit card processing fees.
One-time payments to individuals work well with personal checks. Paying your babysitter, lawn care person, or handyman with a check beats trying to coordinate app transfers.
Large security deposits often require cashier’s checks instead of personal ones. Landlords and car dealers like the guaranteed funds that come with bank-issued checks.
Gift giving gets a classic touch with checks. They’re safer than cash for mailing and let you write a personal note in the memo line.
Privacy protection matters to some people. Checks don’t require sharing your bank account details with online payment systems or apps.
Record keeping becomes easier with paper checks. They create physical proof of payments that help with taxes and budgeting.
Other Types of Checks to Know About
Personal checks aren’t the only game in town. Understanding different check types helps you pick the right one for each situation.
Cashier’s checks come directly from your bank using their own funds. You pay the bank first, then they write the check. These carry more weight because the money is guaranteed. Use them for large purchases like cars or down payments.
Certified checks start as your personal check, but the bank verifies you have enough money to cover it. They often hold that amount in your account until the check clears. This prevents bouncing but costs a small fee. These are becoming more and more rare, and heve been all but replaced by Cashier’s checks.
Money orders aren’t technically checks but work similarly. You pay cash upfront at places like post offices or grocery stores. They’re good for people without bank accounts or when you need guaranteed payment.
Payroll checks come from employers, though most companies use direct deposit now. If you still get paper paychecks, treat them like any other check for depositing.
Staying Safe with Checks
Check security matters more than you might think. A few smart habits keep your money protected.
Always use permanent ink in blue or black. These colors scan well and don’t raise fraud concerns. Avoid gel pens that might smudge or fade.
Never sign blank checks for any reason. Some people think pre-signing saves time, but it creates huge risks. Anyone who gets that check can fill in any amount and any payee.
Treat your checkbook like cash because that’s basically what it is. Keep it in a secure place at home. Don’t leave it in your car or carry the whole book around town.
Report problems immediately if checks go missing. Call your bank right away about lost or stolen checkbooks. They can put alerts on your account and help prevent fraud.
Monitor your account balance regularly to avoid bounced checks. Banks charge hefty fees when you write checks without enough money to cover them. These fees add up fast and hurt your banking relationship.
Keep good records of every check you write. Use your check register or a notebook to track check numbers, amounts, and payees. This helps spot unauthorized checks quickly.
Mastering Your Money Skills
Learning how to write a check correctly gives you another tool in your financial toolkit. Even as digital payments grow, checks remain useful for specific situations.
The key is understanding each part of the check and taking time to fill it out properly. Rushing leads to mistakes that cost time and money. Double-check names, amounts, and dates before signing.
Remember that checks create permanent records of your spending. Use this to your advantage for budgeting and tax preparation. The memo line helps you remember what each payment was for months later.
Your financial literacy grows with each new skill you master. Knowing how to write a check is just one piece of managing money well. Keep learning, keep growing, and keep taking control of your financial future.
Frequently Asked Questions
What essential information do I need to write on a check? You need the current date, payee’s full name, payment amount in both numbers and words, and your signature. Everything else is optional but helpful.
What happens if the written and numerical amounts on my check differ? Banks usually honor the written amount when there’s a difference. However, some banks might reject the check entirely. Always make sure both amounts match exactly.
My handwriting isn’t very neat. Can this cause problems? Yes, unclear writing can delay processing or cause errors. Write as clearly as possible, and consider printing instead of cursive if your handwriting is hard to read.
What should I do if I make a mistake while writing a check? For small mistakes, draw one line through the error, write the correction above it, and initial the change. For major errors, void the check by writing “VOID” across it and start over.
How long does it typically take for a check to clear? Personal checks usually clear within 1-3 business days. Cashier’s checks and government checks often clear faster, sometimes within one business day.
How long are checks valid for? Most checks expire after six months (180 days) from the date written. Banks aren’t required to honor older checks, though some might at their discretion.
Can I write a check for any amount? You can only write checks for amounts up to your available account balance. Writing checks for more than you have results in bounced check fees and potential banking problems.